















How to Choose a Microphone for Home Recording: Use, Room, and Connectivity
How to Choose the Perfect Microphone for Home Recording
Choosing a microphone for home recording depends mainly on what you plan to record, the acoustics of the room, and how you’ll connect it to your equipment. A microphone that works well for singing in a quiet room may not be the most convenient choice for podcasting or calls in a room with background noise.
There’s no single model that suits every situation. Before you buy, consider where you’ll be recording and how you want to work: with a simple direct connection or with additional equipment.
Dynamic and condenser are two types of microphones; USB and XLR are connection types. These are separate choices. Understanding the difference can help you decide whether a microphone suits your needs and whether you’ll need additional equipment.
Start with three considerations: what you’ll record, how quiet and echo-free the room is, and whether you want to connect the microphone directly to your computer. A dynamic microphone may work well for close-miked speech, but it won’t eliminate background noise or echo. A condenser microphone isn’t automatically the best choice for singing, either: it may pick up more of the room’s sound, so its suitability depends on where and how you record.
For speech, podcasts, and online calls, check whether the microphone is comfortable to use at close range and whether its connection works with your computer. For vocals or instruments, choose a microphone suited to the sound source and room conditions; no single type is necessarily right for every voice or instrument.
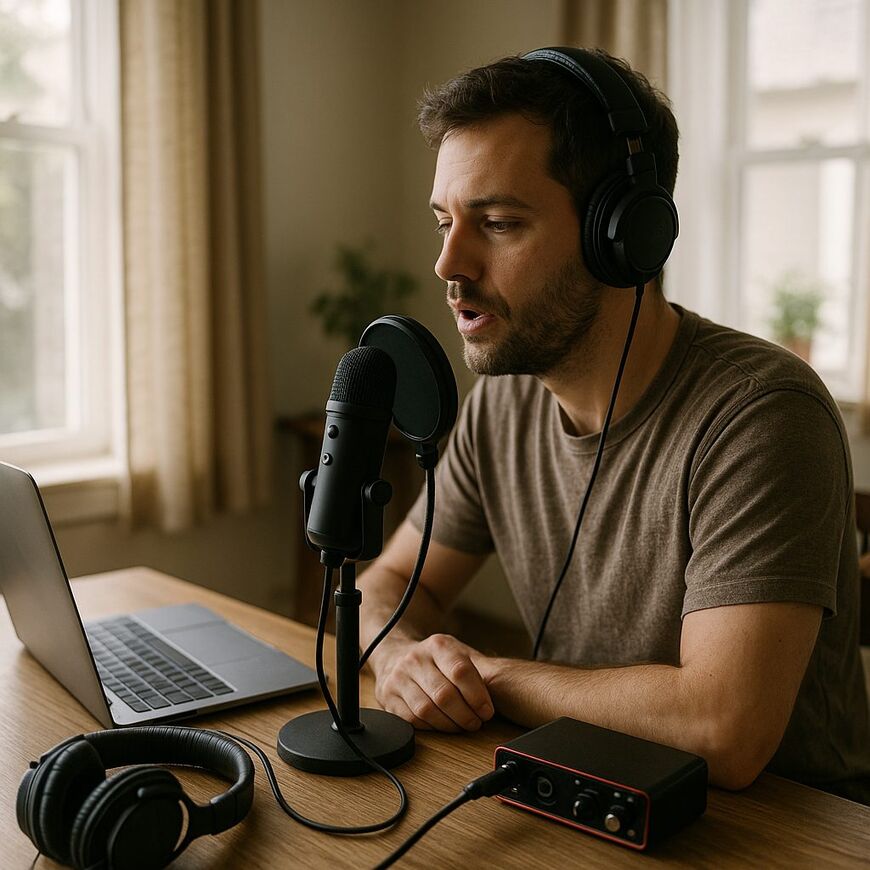
A USB connection may be all you need for a simple home-recording setup, since many USB microphones connect directly to a computer. An XLR connection usually requires compatible equipment, such as an audio interface or mixer, and a condenser microphone may also need power. XLR doesn’t guarantee better sound quality by itself, and starting with USB doesn’t mean you’ll have to upgrade later.
Before buying, check that the microphone is compatible with your computer or device, confirm its connection type, and find out which accessories are included and what else you’ll need to use it. If the microphone has a front-facing pickup pattern, it primarily picks up sound from the front and less from the sides and rear; check which side you need to speak into. Correct, close placement can improve voice recordings, but it won’t fix a noisy or echoey room. Models, stock, and package contents can change, so check the product details at the time of purchase.
What Are You Recording, and What Is the Room Like?
Start by considering how you’ll record: one person speaking, singing, playing an instrument, or several people together. Each situation has different requirements. Echo, a noisy fan, a running computer, and street noise can also affect your recording, regardless of the microphone type.
Decide what matters most to you: clear vocals, recording an instrument, or reducing room noise. Proper, close placement can help, but it won’t eliminate echo or constant background noise.
- One person speaking: Look for a microphone that’s easy to position close to you without getting in the way while you work.
- Online calls: Make sure the connection works with your computer and other equipment, and that you can select the microphone as the audio input in your software.
- Singing or playing an instrument: Choose a model suited to the sound source and the way you plan to record.
- A room with echo or background noise: Consider where you can place the microphone and how far away you’ll be. The words “dynamic” or “condenser” alone don’t predict how the room will sound in a recording.
- Several people speaking: Check which directions the microphone picks up sound from and whether each participant needs a separate microphone.
For example, recording a solo podcast at a desk in an echoey room is different from recording a conversation with two participants. Choosing based only on the type of recording may cause you to overlook important details, such as the room size and where the speakers are seated.
Dynamic or Condenser: Which Is Right for Your Recording?
Once you’ve decided what you’ll record and where, you can compare microphone types. Your choice also depends on whether the room is quiet or has echo and background noise, as well as how close you’ll be to the microphone when speaking or singing.
Dynamic and condenser microphones are built differently, and their characteristics vary from model to model. Condenser microphones often require power, so check the model’s requirements and the equipment you have.
- Speaking in a room with background noise: A dynamic microphone that can be positioned close to your mouth may be a good fit, especially if its pickup pattern focuses on the area in front of it. It won’t filter out room noise on its own, so make a test recording to hear what it picks up.
- Singing in a quiet room: A condenser microphone may be suitable when capturing vocal detail is important, but a dynamic model may work well too. Check the model’s specifications and the distance at which it works best—not just its microphone type.
- Recording an instrument: Position the microphone at a distance and angle suited to the instrument and the sound you want. If the instrument is especially loud, check the specifications to make sure the microphone can handle its sound level. Placement can affect the result just as much as the microphone type.
- Several people speaking: Choose a pickup pattern suited to the participants’ seating arrangement. A microphone that mainly picks up sound from the front may work well for one person, but it may not capture several people seated around a table at the same level.
The rules “dynamic for noisy rooms” and “condenser for every singer” don’t apply to every situation. A dynamic microphone can pick up background noise, and a condenser can work well for home singing when the model and placement are right. Consider the model’s characteristics and the actual recording conditions.
USB or XLR: How Much Equipment Do You Want to Connect?
The connection type affects the equipment you’ll need and your recording options. The table below outlines the main differences; exact requirements depend on the model and the equipment you have.
| Connection | Required Equipment and Compatibility | When Might It Be a Good Fit? |
|---|---|---|
| USB | The microphone usually connects directly to a computer. A phone or tablet may require an adapter or a suitable power source. Check compatibility with your device and recording software. | For anyone who wants a simple connection and usually records one sound source. |
| XLR | You’ll need a microphone and a compatible cable, and usually an audio interface or another compatible solution. An audio interface connects an XLR microphone to a computer and transfers its audio signal. Check the model’s requirements and make sure your existing equipment is compatible. | For anyone who already uses an audio interface or needs to connect multiple sound sources. Many interfaces support multiple sources, but the number of inputs varies by model. |
With a USB microphone, the conversion to a signal the computer can process usually happens inside the microphone. With an XLR connection, the audio interface or another suitable component handles the connection to the computer. An XLR connection generally doesn’t plug directly into a computer the way USB does, although various solutions are available, including adapters and products with a built-in interface.
Before buying, check the available connections, compatibility, the equipment you already own, and the total cost. If you’re recording only one sound source, there’s no need to buy a complex setup just because you think a USB microphone will limit you later. On the other hand, an audio interface may suit you if you need additional inputs or already own compatible equipment.
Connecting Directly to a Computer or Phone
On the computer or mobile device you plan to use for recording, make sure the microphone is recognized and can be selected as the audio input in your software. For a phone or tablet, check adapter and power requirements in advance; a plug that fits the port doesn’t necessarily guarantee compatibility.
When Do You Need an Audio Interface and Other Equipment?
If you choose an XLR microphone, make sure your interface or compatible device has the right input and connects to your computer. Also check whether the microphone needs power and whether your equipment can provide it. You may need to buy a cable separately; check the specifications and equipment instructions to confirm.
Microphone Placement and Pickup Patterns
A pickup pattern describes the directions from which a microphone picks up sound. Cardioid is an example of a directional pattern: it mainly picks up sound from the front, less from the sides, and generally less from the rear. Other patterns pick up sound from additional directions. Choose a pattern based on how many people will be recording and where they’ll be positioned.
You can’t always tell which side to speak into from the microphone’s shape or the location of its connector. Check the markings on the microphone, the product illustration, or the model’s instructions. Some models are designed to be spoken into from the end, while others are designed for speech from the wider side, so don’t rely on appearance alone to determine the pickup direction.
For a solo recording, position the microphone in front of you where it’s comfortable to speak and easy to keep in place throughout the recording. Make sure the stand or mounting method suits your desk, and that you can speak without leaning forward or restricting your hand movements. If several people are participating, check that the pickup pattern suits the seating arrangement: a microphone that mainly picks up sound from the front may not capture everyone at the same level.
Before an important recording, record a few seconds and listen back with headphones. Check that your voice is clear and that typing, fan noise, or echo isn’t distracting. If you hear noise, adjust the microphone’s angle or position in relation to the noise source, then record again. The effect of these changes will depend on the room and the model.
A pickup pattern won’t eliminate background noise or echo; it only determines which sounds are picked up from different directions. In an echoey room, try a different microphone position. You can also add soft furnishings to the room and see whether they improve the recording. A short test in the room itself will tell you more than the pattern name or product description alone.
Check the Microphone’s Direction and Placement
If you’ll change position or move during recording, check that the microphone and stand remain stable and don’t interfere with your hand movements. Set them up to suit your usual working position.
What to Check on the Product Page Before Buying
Before placing your order, make sure the microphone’s specifications, your recording equipment, and your intended use are all compatible. A photo or brief description may not make it clear which accessories are included and which you’ll need to buy separately.
- Connection and compatibility: Check the microphone’s connection type and make sure it works with your computer and recording equipment. If you need an adapter, confirm that it’s compatible with your existing connection.
- Additional equipment: An XLR microphone generally requires an audio interface and a cable. Check the product page to see what’s needed and what’s included in the package. If a power requirement is listed, make sure your equipment supports it.
- Package contents: Check whether a stand, cable, or other accessories are included. An item shown in a photo isn’t necessarily part of the package.
- Placement options: Make sure you can position or mount the microphone on your desk, and check which side you need to speak into.
- Software and operating system: If compatibility requirements are listed, make sure they suit your computer and recording software.
- Model and stock: Confirm that you’ve selected the right model and read the specifications and notes before ordering. Package contents and stock may vary between models.
If the connection details or required equipment aren’t clear, check before you buy. This will help you make sure you already have everything you need to start recording.


