Camera Bag Buying Guide: What to Check Before You Buy
Before choosing a camera bag, think about what you actually need to carry. A bag that looks spacious on the outside may not fit your camera with the lens attached, or leave room for an extra lens and the accessories you usually bring along.
Gather the gear you use most often, then check the compartments’ dimensions and layout. The bag’s total capacity does not tell you whether your camera will fit comfortably or whether there will be room for your other equipment. Choose a carrying style that suits the amount of time you expect to be on the move, and check that the padding and opening work for the way you plan to use the bag.
To check whether a bag will fit your gear, make a list of your camera, the lens attached to it, and the accessories you usually carry. Compare your equipment’s dimensions with the compartment’s internal measurements, and make sure there is enough room to take the camera in and out without forcing it. Product photos and capacity figures in liters can provide a general idea, but they do not always show the compartment shapes or interior layout. If the details are unclear, look for the compartment dimensions in the model’s specifications.
The type of bag affects both access to your gear and carrying comfort. A sling bag may suit someone looking for a relatively compact bag with convenient access, although the amount it can hold depends on its size. A shoulder bag can make it easy to reach your camera, but the weight rests on one shoulder. A backpack may be a better choice for carrying more equipment or walking for extended periods, though getting to your camera may be less immediate. The right choice depends on how much gear you carry and how you use it—there is no one style that works for everyone.
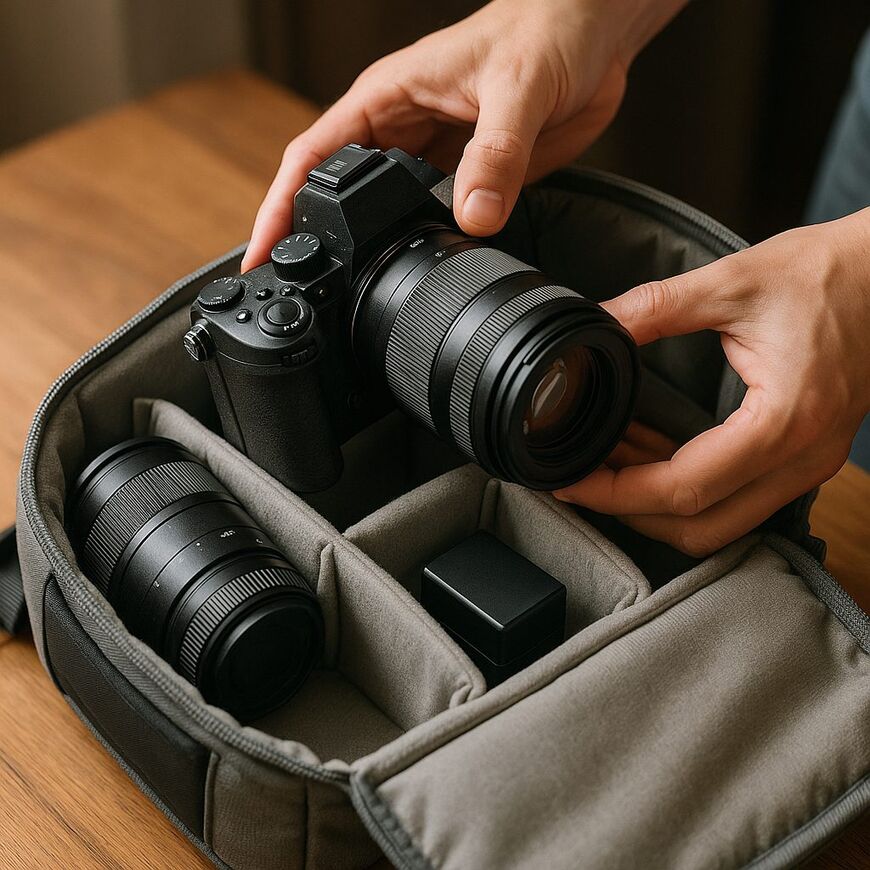
Check whether the padding protects your equipment and whether the dividers separate the camera, lenses, and accessories. A well-organized interior can reduce contact between items, and some models have adjustable dividers that let you customize the compartment. Consider how comfortable the bag will be when it is full, not just when it is empty. Pay attention to how the weight is distributed and how the straps feel. Protection from dust, moisture, and impacts varies by model, so check the specifications for the specific bag.
Rain protection also varies. Check what the manufacturer says about water exposure and whether a rain cover is included. Do not assume that a bag described as water-resistant is suitable for every type of rain or use. If you are considering a larger bag to make room for additional equipment, think about the items you genuinely plan to add. Extra space for gear you expect to use can be helpful, but an unnecessarily large bag may add bulk and weight without providing any benefit.
Start by Matching the Bag to Your Camera and Gear
Measure your camera with the lens attached, in the position you plan to store it in the bag. Compare the measurements with the internal dimensions of the camera compartment, and check that the camera can pass through the opening comfortably. If you leave a lens cap on while the camera is stored, include it in your measurements. A bag that looks roomy on the outside may be cramped inside because of its padding, compartment shape, or narrow opening.
A capacity figure in liters is useful for an initial comparison, but it does not guarantee that your gear will fit. Two bags with similar capacities may have compartments with different dimensions and shapes. When checking the specifications, make sure you know which compartment each measurement refers to, and check that the opening and dividers let you put the camera in and take it out without forcing it.
How to Check the Fit
Compare the dimensions of your camera with the lens attached to the compartment’s internal measurements—not the bag’s external dimensions. Check the opening’s width, too: even a compartment that appears large enough on paper may be awkward to use if the opening is narrow. The dividers should separate the camera from your accessories without pressing against them. If the dividers can be moved or removed, check how much room is left after adjusting the layout.
Padding thickness and the shape of the corners affect the usable space, so leave a reasonable margin rather than relying on a tight fit. If you can try the bag in a store, put your gear inside and check that you can take it out easily. When ordering online, ask the seller for the compartment and opening dimensions before purchasing if they are not listed. Photos can help you understand the bag’s layout, but they are no substitute for measurements.
Plan Space for Accessories
Think about the accessories you actually carry, such as an extra battery, a charger, or another lens. Check the dimensions of the compartments intended for them and review the interior layout to make sure they will fit without pressing against your camera. There is no need to choose a larger bag for gear that usually stays at home.
If you already carry an accessory—or plan to add one to your photography routine soon—it may be worth choosing a slightly roomier compartment. On the other hand, an oversized bag that is not filled takes up more space, and equipment inside it may shift around if it is not secured properly. Choose a bag based on what you expect to carry regularly, rather than on the general possibility of adding more gear in the future.
Sling Bag, Shoulder Bag, or Backpack: Which Is Right for You?
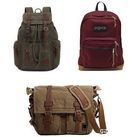
Retailers do not always use bag-category names consistently, so look beyond the label. Check how the bag sits on your body, how the weight is distributed, where the opening is, and how easily you can take out your camera. A sling bag is carried at your side, often with a strap worn diagonally across the body. A shoulder bag hangs from one shoulder, while a backpack is carried on your back with two straps. In practice, the design and how you use the bag matter more than its name.
- A bag that can be moved to the front and opened without taking it off may suit people who reach for their camera often, such as street photographers or those heading out for a short trip. Check that the opening is easy to reach and that you can take out the camera without catching it on the dividers. Carrying the weight on one side may become uncomfortable over longer periods.
- A shoulder bag may suit someone who prefers a small or medium-sized bag carried at their side. Check whether the strap is adjustable and comfortable, and consider how the bag feels when full. The opening’s position and the type of closure also affect how easily you can reach your gear.
- A backpack may be a good choice for carrying more equipment or walking for extended periods, as the weight is distributed across both shoulders. Check whether you need to take it off to reach your camera or whether it has an opening that lets you access the camera while wearing it. The interior layout also affects how quickly you can take your gear out.
No single carrying style is right for everyone. For a long trip, carrying comfort may be the main priority, while quick access may matter more if you take your camera out frequently. If you also carry personal items, check whether the bag has a separate compartment for them so they do not press against your camera gear. The bag’s shape alone does not indicate how much protection it provides: padding, dividers, and closures vary from model to model.
Before ordering, check the product photos to see where the opening is, how it opens, and whether the straps can be adjusted. Visit the product page for the CASE LOGIC TSC-2 camera bag to review the model details. To check whether it will fit your gear, compare the listed measurements with the dimensions of your camera and lenses.
Padding, Organization, and Rain Protection
Padding helps limit how much your gear moves inside the bag and can soften some impacts. Check whether the camera compartment’s walls and dividers are padded. Dividers separate your camera from accessories and reduce friction between them, but they are not a substitute for a secure closure and careful handling.
Check how the main compartment closes and what the manufacturer says about water protection. Descriptions such as “water-repellent fabric,” “water-resistant bag,” and “rain cover” do not all promise the same level of protection. Read the manufacturer’s description and the stated conditions of use for the specific model, and check whether the cover is included or sold separately. If a cover is included, make sure it is designed to cover the bag while it is closed.
The label “waterproof” does not guarantee protection in every situation—especially if the bag is submerged in water. If you expect to use the bag in the rain, check the manufacturer’s stated protection conditions and whether a separate cover is required. If the information is unclear, do not rely on the product photo or general wording alone to determine the level of protection.
A rigid appearance or thick padding alone does not mean that a bag is suitable for every use. Check the model’s protection details and make sure they match how you plan to use it.
Comfort and Access to Your Gear on the Go
A bag may fit your camera and still be awkward to use. Check whether you can take out your camera or a small accessory without emptying the bag, and whether the opening is easy to reach when the bag is on the ground or being carried. It is also worth checking that the zippers open smoothly and the dividers stay in place while the bag is moving.
Check that the straps are adjustable and padded around the shoulder or back. If the bag has a chest or waist strap, find out whether it can be removed. A wide opening can make it easier to take out your camera, but make sure the closure also suits your protection needs and intended use. A separate pocket for small accessories can help keep things organized and stop them from moving around next to your camera.
An empty bag may feel comfortable, but that can change when it is loaded. If you can try it in a store, test the bag with your equipment and see whether the weight pulls to one side or the straps press uncomfortably as you walk. When ordering online, review the return policy in case the bag is uncomfortable to carry or does not fit your gear.
What to Check Before Ordering a Camera Bag
Before placing your order, review the specifications and purchase details. If information about dimensions, capacity, or a rain cover is missing, contact the store to clarify before buying. This quick checklist can help you compare your options:
- Check that your camera with the lens attached fits the compartment and its opening, and that the interior layout suits your other gear.
- Review the details about padding and water protection, and check what is included with the bag.
- Check the listed weight of the empty bag and consider whether it will be comfortable to carry when loaded with your equipment.
- Review the contents list and return policy, especially if you cannot try the bag before buying.
If the product page is missing information that could affect your choice, such as exact dimensions or details about a rain cover, contact the store to find out before placing your order.